DYE-PENETRANT FLAW DETECTION
Our Dye-Pen Process
-
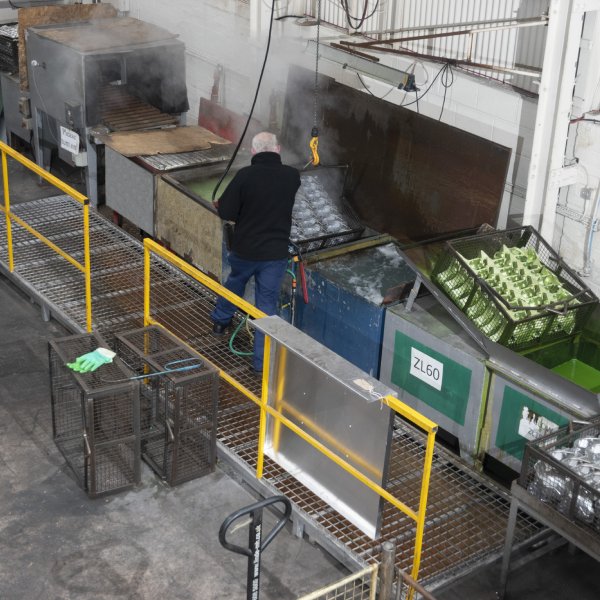
Parts are dipped in penetrant, once submerged under the surface it is then immediately withdrawn.
-
The parts then dwell for a set amount of time, any excess penetrant is removed and soaked in cold water.
-
Once removed from the cold water we flash dry and heat the parts for a set amount of time.
-
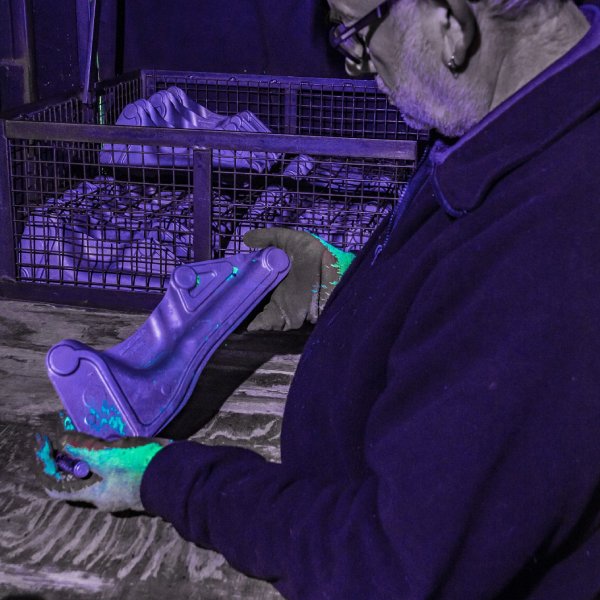
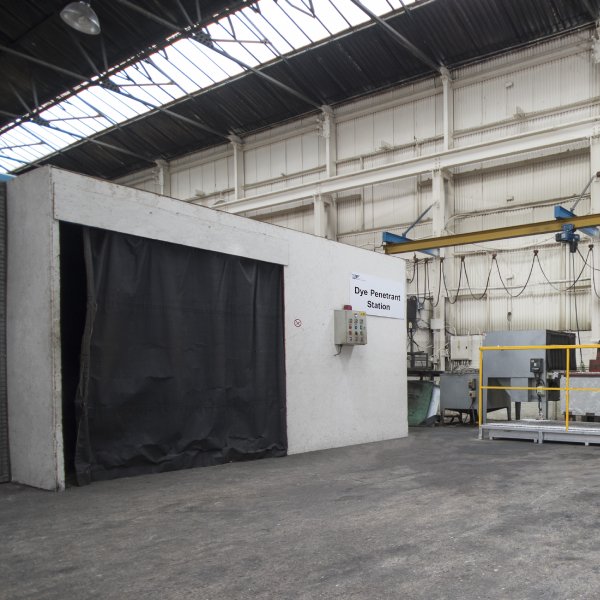
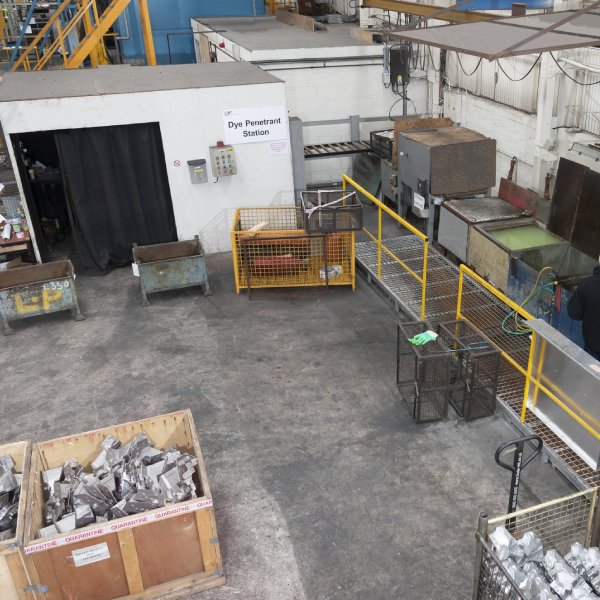
Once the parts have been heat treated they are transferred to the Dye Penetrant Station for inspection. All inspectors are trained and certified to PCN level II.
-
This can also be done as a stand alone service as well as after heat treatment and we are happy to give you a free trial.
What Is Dye-Penetrant Flaw Detection?
Dye-Penetrant Flaw Detection, commonly known as Dye-Pen, is a non-destructive testing (NDT) technique used to detect surface-breaking flaws in non-porous materials such as metals, ceramics, and plastics. This technique uses a liquid penetrant to detect the presence of any cracks, fissures, or other discontinuities on the surface of the material being tested.
The basic principle behind Dye-Penetrant Flaw Detection is relatively simple. A liquid penetrant is applied to the surface of the material being tested, and allowed to seep into any surface-breaking flaws. After a specified amount of time, the excess penetrant is removed from the surface, and a developer is applied. The developer acts as a contrasting agent, drawing the penetrant out of any surface-breaking flaws and highlighting them for inspection.
The Dye-Pen technique has several advantages over other NDT methods.
Firstly, it is relatively simple and inexpensive to use, making it a popular choice for smaller companies or organizations with limited resources.
Additionally, the Dye-Pen method can be used on a wide variety of materials, including those with complex shapes or geometries.
This technique is also highly sensitive, allowing it to detect even the smallest of flaws that may be missed by other inspection methods.
There are also some disadvantages to using Dye-Pen:
For one, it can only be used on non-porous materials, meaning that it is not suitable for inspecting materials such as wood or concrete.
Additionally, the technique is not effective at detecting flaws that are located beneath the surface of the material being tested, as the liquid penetrant can only reach surface-breaking discontinuities.
Dye-Penetrant Flaw Detection Is Non-Destructive Testing (NDT)
One of the key advantages of Dye-Pen is that it is a non-destructive testing method. This means that the material being tested is not damaged or altered in any way during the inspection process. This is important for materials that are expensive or difficult to replace, as well as for components that will be reused or recycled.
The 4 Methods Of Penetrant Systems
Water Washable Penetrant System
The first type of penetrant system is water washable. This system uses a water-washable penetrant that is easy to apply and remove. The penetrant is applied to the surface of the material being tested, and after a set amount of time, excess penetrant is washed away with water. This system is ideal for use on parts that are sensitive to solvents and is often used in the aerospace industry.
Post-Emulsifiable, Lipophilic Penetrant System
The second type of penetrant system is post-emulsifiable, lipophilic. This system uses a lipophilic penetrant that is applied to the surface of the material being tested. After a set amount of time, excess penetrant is removed from the surface, and a developer is applied. The developer draws the penetrant out of any surface-breaking discontinuities, highlighting them for inspection. This system is ideal for use on non-porous metals and is often used in the automotive and manufacturing industries.
Solvent Removable Penetrant System
The third type of penetrant system is solvent removable. This system uses a solvent-based penetrant that is applied to the surface of the material being tested. After a set amount of time, excess penetrant is removed from the surface using a solvent. This system is ideal for use on materials that are not sensitive to solvents and is often used in the oil and gas industry.
post-emulsifiable, hydrophilic Penetrant System
The fourth type of penetrant system is post-emulsifiable, hydrophilic. This system uses a hydrophilic penetrant that is applied to the surface of the material being tested. After a set amount of time, excess penetrant is removed from the surface, and a developer is applied. The developer draws the penetrant out of any surface-breaking discontinuities, highlighting them for inspection. This system is ideal for use on non-porous materials and is often used in the medical and pharmaceutical industries.
Dye-Penetrant Flaw Detection FAQ’s
Dye-penetrant flaw detection involves applying a colored dye to the surface of a material, allowing it to seep into any surface defects. After a specified time, excess dye is removed, and a developer is applied to highlight any indications of flaws.
Dye-penetrant flaw detection can identify surface cracks, porosity, laps, leaks, and other surface defects that are open to the surface. It is particularly effective for detecting flaws in non-porous materials such as metals and ceramics.
Dye-penetrant flaw detection is primarily used on non-porous materials such as metals, ceramics, plastics, and composites. It may not be suitable for porous materials like wood or certain types of stone.
Dye-penetrant flaw detection offers several advantages, including high sensitivity to surface defects, ease of use, versatility across materials, cost-effectiveness, and the ability to inspect complex shapes and intricate parts.
Yes, dye-penetrant flaw detection can be automated to enhance efficiency and accuracy. Automated systems can streamline the process, reduce human error, and increase productivity.
Dye-penetrant flaw detection has limitations. It is primarily suitable for detecting surface flaws and may not be effective for subsurface or internal defects. Additionally, it requires proper surface preparation and may not be ideal for rough or heavily textured surfaces.
Yes, dye-penetrant flaw detection can be used on both ferrous (iron-based) and non-ferrous metals, including aluminium, copper, titanium, and stainless steel.
No, dye-penetrant flaw detection is a non-destructive testing method. It does not alter the material’s properties or cause any damage during the inspection process.
Safety precautions for dye-penetrant flaw detection include proper ventilation in the inspection area, using personal protective equipment (PPE), handling chemicals according to safety guidelines, and disposing of waste properly.
Dye-penetrant flaw detection is a widely used and reliable method for detecting surface flaws. However, its effectiveness depends on proper surface preparation, skilled application, and adherence to testing standards and procedures.


